Hiking Cerro de la Silla: Routes, Difficulty & Tips
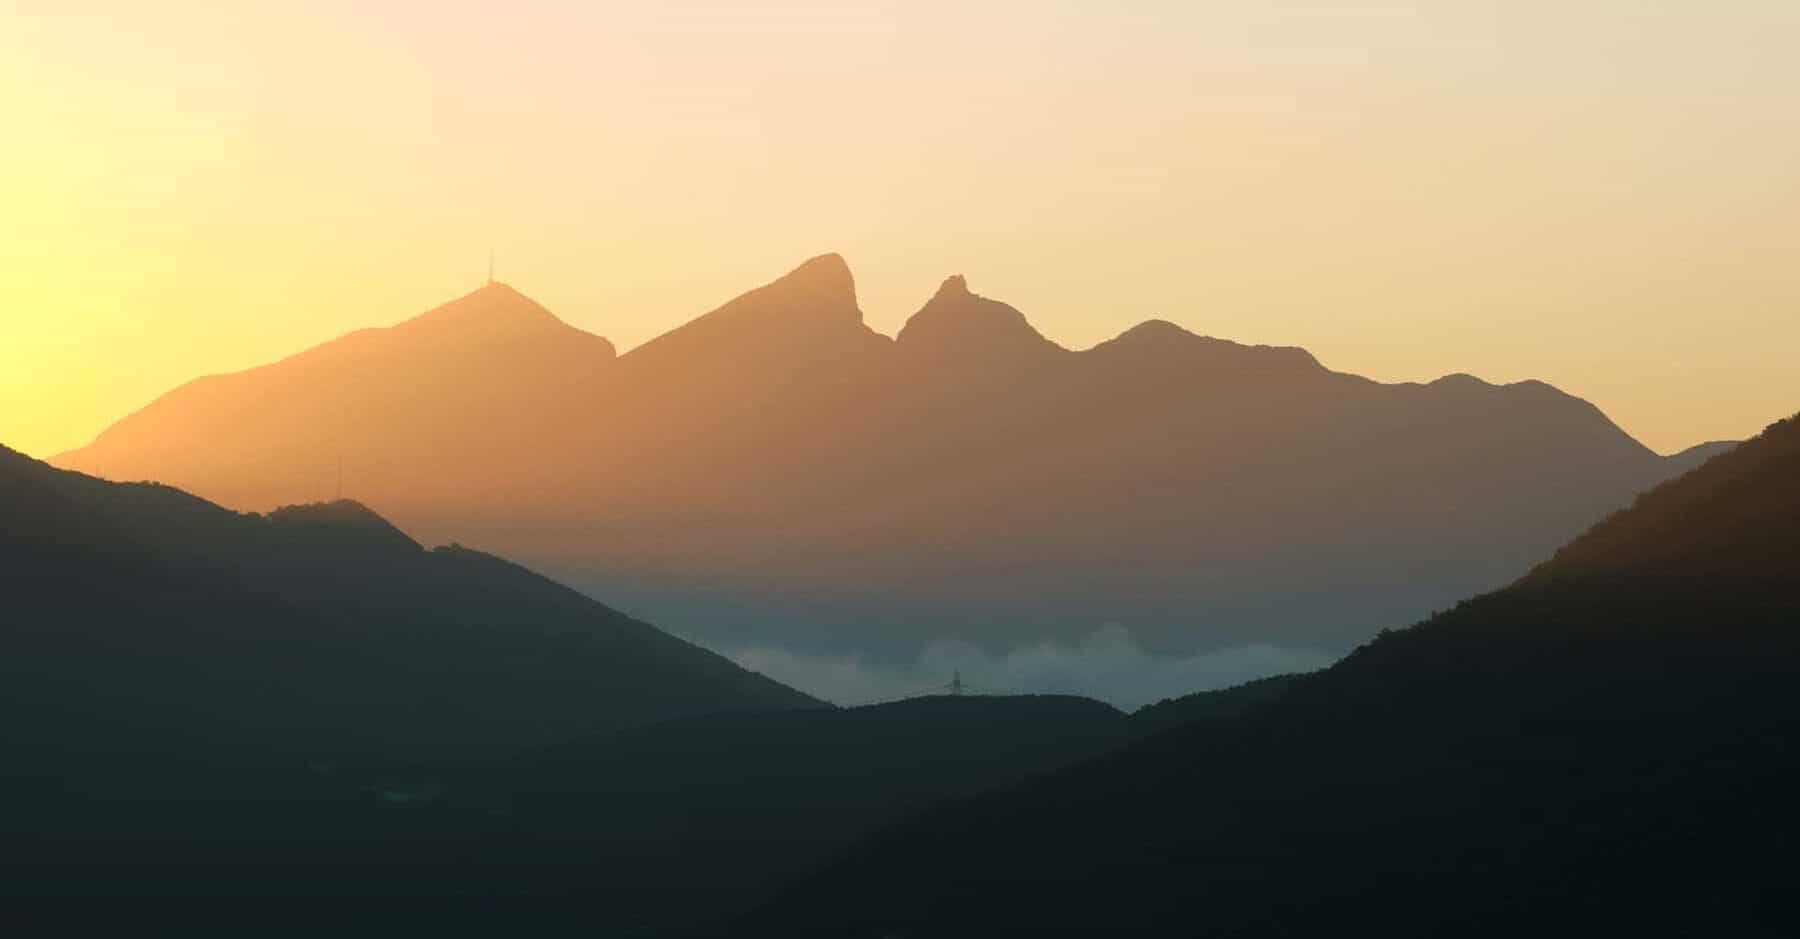
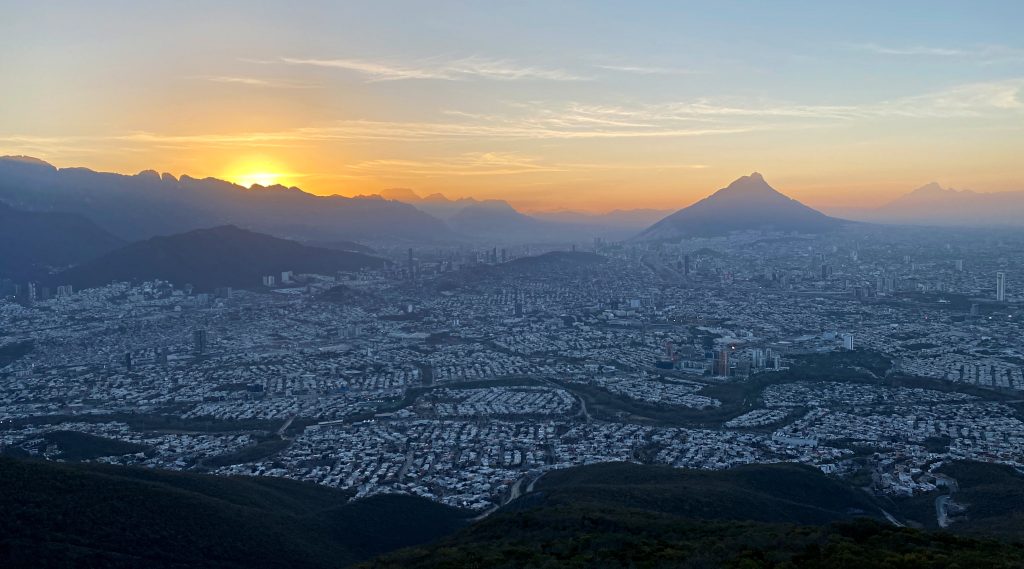
When I first moved to Monterrey in 2016, I didn’t even realise you could hike Cerro de la Silla. Its distinctive saddle-shaped silhouette was simply part of the skyline.
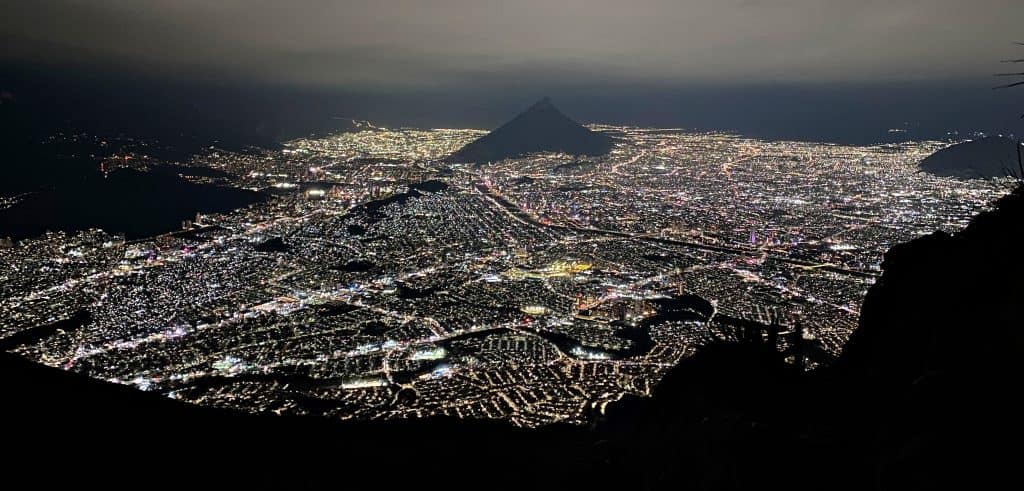
That all changed when Uri took me to El Teleférico on a weekday evening. Seeing the sprawling city lit up at night unlocked a whole new side to Monterrey, and I’ve returned countless times since.
This guide covers the main hiking routes, including difficulty, access points and all the practical information you need to plan your visit.
At a glance: Which hike should I choose?
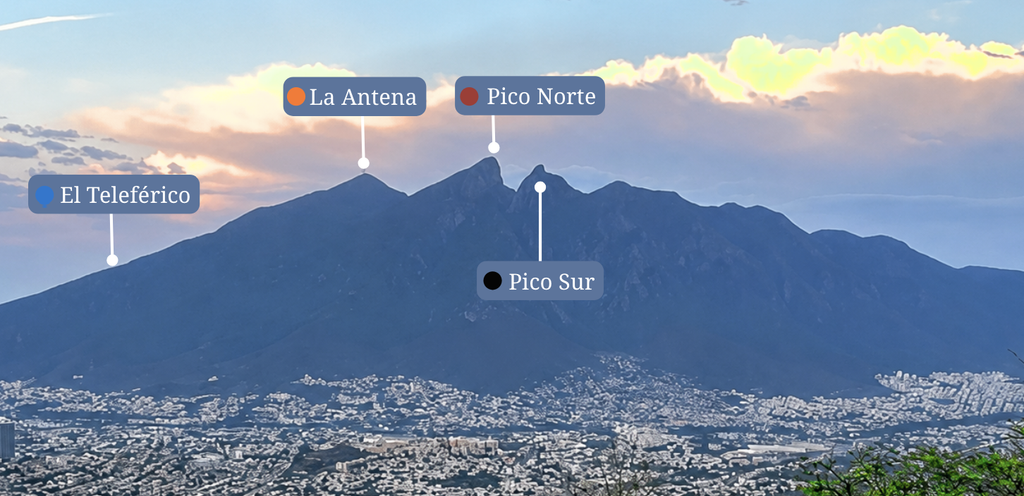
There are four main hiking destinations on Cerro de la Silla: El Teleférico (technically a view point, not a summit), La Antena, Pico Norte and Pico Sur.
Each varies significantly in length and difficulty, so the best choice depends on your hiking experience and the kind of adventure you’re looking for.
The most accessible hike, but still a continuous uphill climb.
Best for: A popular viewpoint with iconic city views.
View route details →A harder hike which makes a good extension to El Teleférico. My go-to for sunrise.
Best for: A longer hike with both mountain and city views.
View route details →3b. Ruta Homero: 5.9km | +1,120m | 4–5 hours
A demanding hike with steep and rocky terrain and some exposed sections.
Best for: Experienced hikers wanting a wilder, more remote adventure.
View route details →An extremely demanding hike with highly technical terrain, sheer drops, scrambling and exposed edges.
Best for: Highly experienced mountaineers seeking an exceptionally technical and exposed climb.
View route details →Getting to Cerro de la Silla
There are different access points to Cerro de la Silla, depending on the route you plan to take. All of the trailheads start within residential areas, so the easiest way to access them is by car or ride services like Uber or DiDi.
The most common start point is located at the end of Calle Bosques de la Pastora in Guadalupe. This is the trailhead leading to El Teleférico, La Antena and Pico Norte via Paso de los Elefantes (hikes 1, 2 and 3a in this guide).
If you’re arriving by car, look for a space on the road on Bosques del Valle, just outside the security booth leading into the neighbourhood. We’ve never had problems parking here, but it’s best not to leave any valuables on display.
Reaching the trailhead
Once you pass the the entrance to the neighbourhood, follow the road straight on for about 750m. There’s a slight climb here, which serves as a good warm-up to the main hike!
At the end of the road, you’ll see a sign marking the beginning of the trail, where there is a wide, well-defined path leading into the mountain.
Quick Links (El Teleferico/ La Antena/ Pico Norte de Paso de los Elefantes):
- On-street parking: Bosques Del Valle
- Security booth (Uber/DiDi drop-off): Calle Bosques de la Pastora
- Trailhead start point: Subida al Teleférico
Trailhead access and cost
There is no charge for hiking Cerro de la Silla, and no official trail opening times. You can access the trails at any time, although starting or finishing in the dark requires extra care and preparation.
1. El Teleférico: The classic Cerro de la Silla hike
Quick Facts: El Teleférico, Cerro de La Silla
Best for: A short hike with iconic city views.
Difficulty: MODERATE
Distance: 6.8 km return | Elevation gain: 590m
Highest point: 1,110 m | Route type: Out & back
Estimated time: 2.5 – 3.5 hours
Start point: Bosques de La Pastora, Guadalupe
Route and stats are from where you park your car (~750 m from the start of the official trailhead).
View Route on Komoot →
Route Overview
El Teleférico is the classic Cerro de la Silla hike and is highly popular with locals. It leads to an old cable car platform which now offers one of the best city views in Monterrey.
This isn’t a remote mountain adventure, but it is a good introduction to Cerro de la Silla if you’re looking for panoramic city views without technical scrambling. Seeing the city lit up at night is a view I never get bored of, no matter how often I return.
While this is the most accessible route on Cerro de la Silla, it’s uphill from the outset and requires a good level of fitness. People we’ve taken here have often found it harder than expected because of the heat, humidity and continuous climb.
Route description
There is only one route to El Teleférico. From the trailhead, stay on the wide, stony path leading up between the trees which is the former access road leading to the old cable platform.
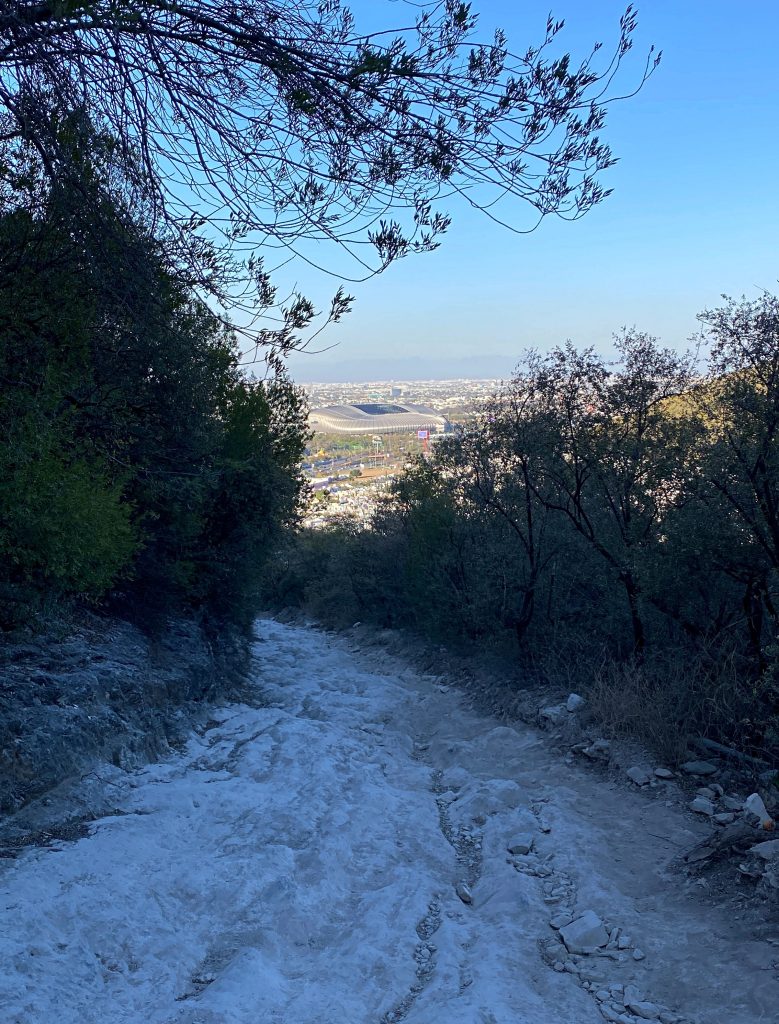
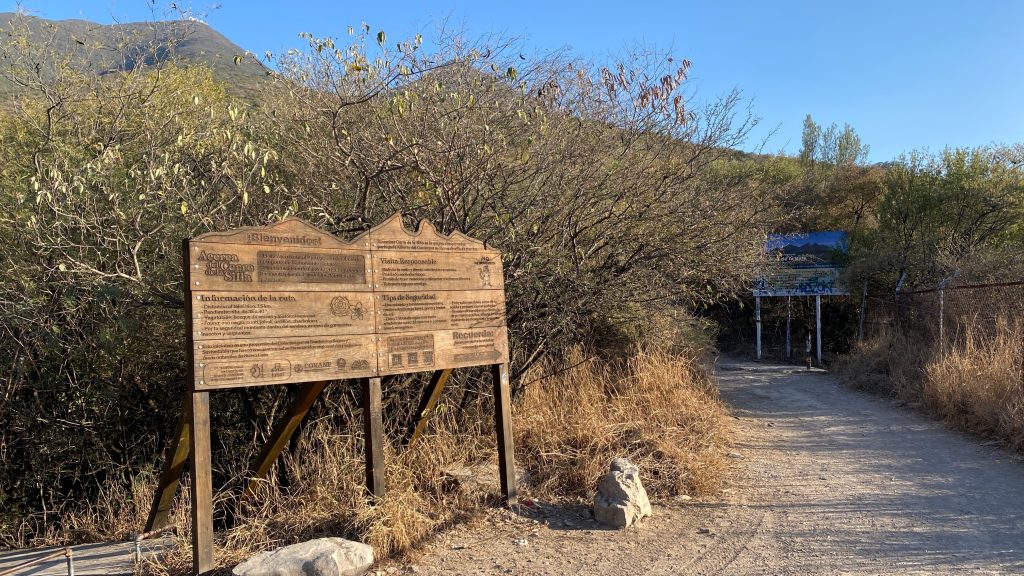
After about 2.6km, there’s a small opening in the hedge on your left which takes you below the old platform. Straight ahead you’ll see stairs which take you to the main viewpoint.
Alternatively, continue along the main track for a few more metres where you’ll see a second opening with some larger rocks, leading straight to the main (upper) viewpoint. If you turn a corner and reach the Christ statue, you’ll know you have gone too far.
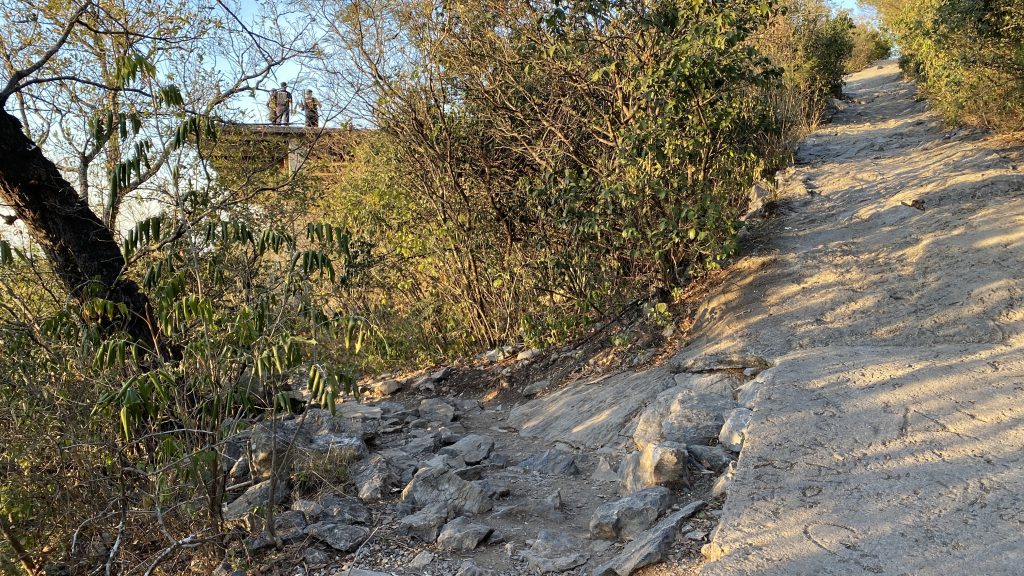
The entrance to the platform can be easy to miss, especially in the dark. Make sure you carry a headlamp and ideally hike with someone who is familiar with the route.
Recent Upgrades
In advance of the 2026 World Cup, the cable car platform received various improvements, including safety railings, benches and paintwork. The photo above was taken prior to these additions.
When to hike
El Teleférico is popular with locals, especially at weekends and at sunset. If you want a quieter hiking experience, aim to hike on a weekday and start early in the morning. This will also avoid hiking up in the heat.
If you do prefer a sunset hike, be prepared for a hot hike up in the afternoon. Make sure you take extra water as well as a head torch for the way back.
The path can be slippery on the way down due to excessive wear. Don’t attempt to hike during or right after heavy rain, when the stone will be particularly slippery.
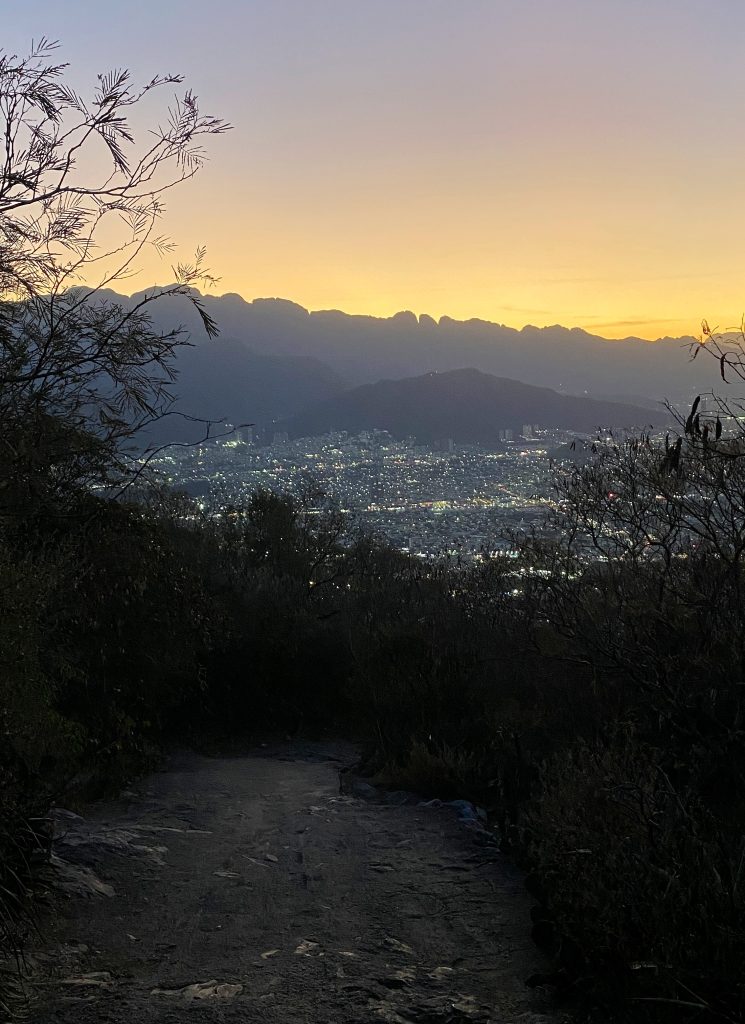
2. La Antena: A longer hike with mountain and city views
Quick Facts: La Antena, Cerro de La Silla
Best for: A steep uphill workout and sunrise views over Monterrey.
Difficulty: HARD
Distance: 12.7 km return | Elevation gain: 1,250m
Highest point: 1,750 m | Route type: Out & back
Estimated time: 4 – 5 hours
Start point: Bosques de La Pastora, Guadalupe
Route and stats are from where you park your car (~750 m from the start of the official trailhead).
View Route on Komoot →
Route Overview
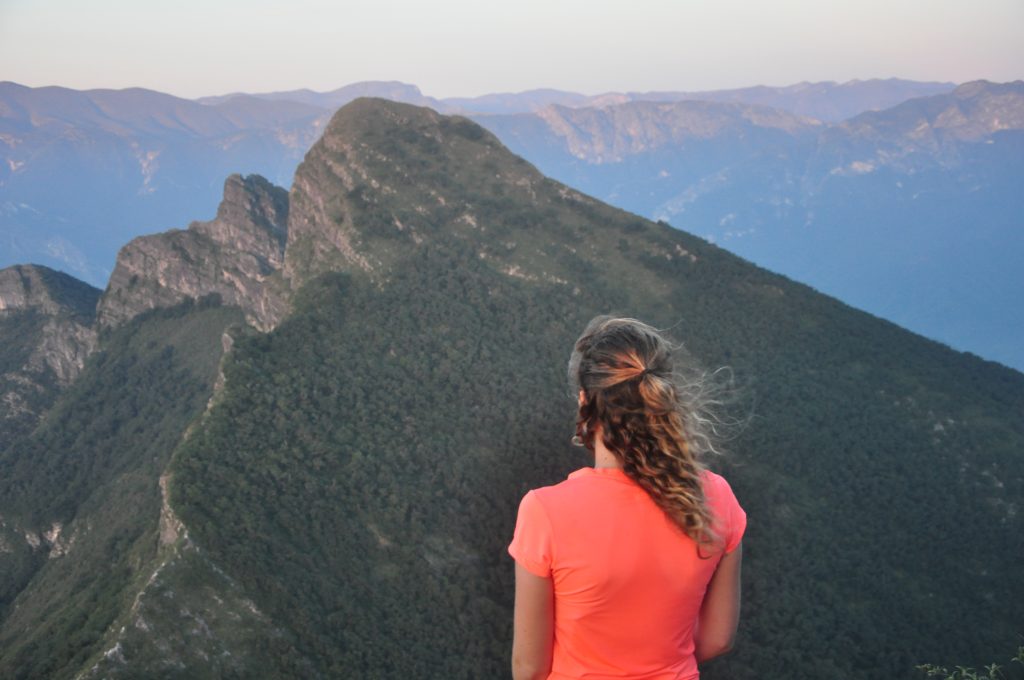
La Antena is my favourite way to experience Cerro de la Silla. It provides the best balance of both city and mountain views, without having to navigate highly technical terrain.
This is a considerably more demanding hike than El Teleférico due to the extra distance and elevation gain. But it follows the same, well-marked path the whole way, with the exception of a very short rocky section right at the end.
The extra effort here is rewarded by a full panorama of the Sierra Madre Oriental on the other side of the mountain, as well as a close-up view of neighbouring Pico Norte.
Route description
The hike to La Antena follows the same path to El Teleférico, then continues for a further 3km. The crowds will fade out as you pass the platform, so this section will feel slightly more remote.
Some parts of the path beyond El Teleférico get marginally steeper than the first section, but it is fairly consistent the whole way up.
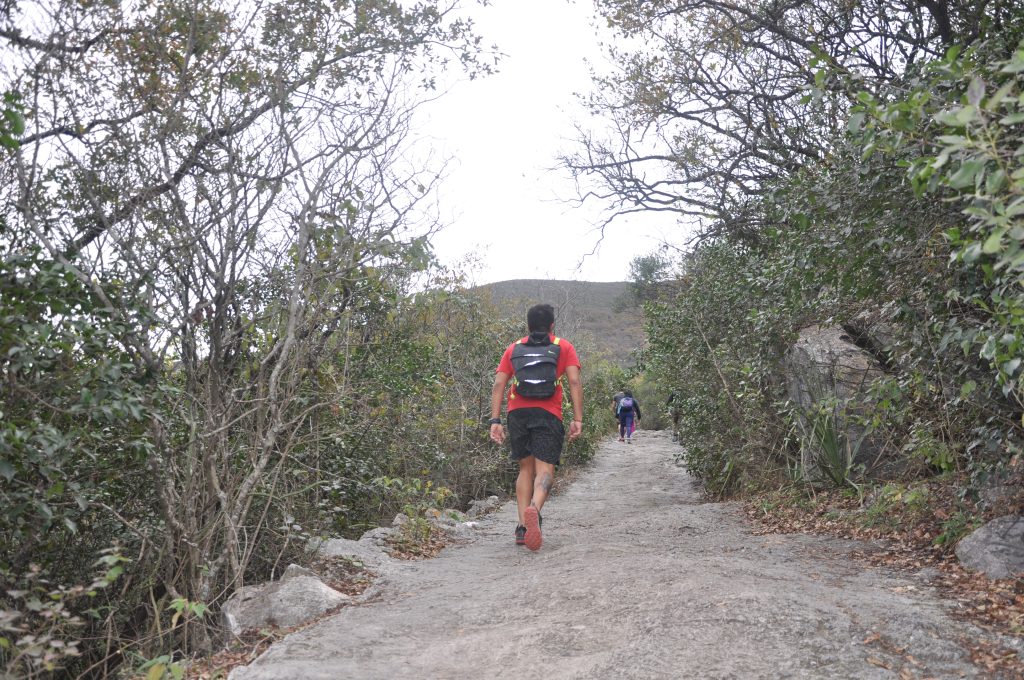
Stay on the main path until you reach the very end of it at the base of the antenna. It looks like you can’t go any further here, but continue straight on and follow the fence.
This is a very short but slightly awkward stretch which doesn’t look like an official path, but keep going for a short distance and the trees open up to the rocky summit. Take care on this section, especially if hiking in the dark. Stay close to the base of the Antena and don’t continue any further down the rocks.
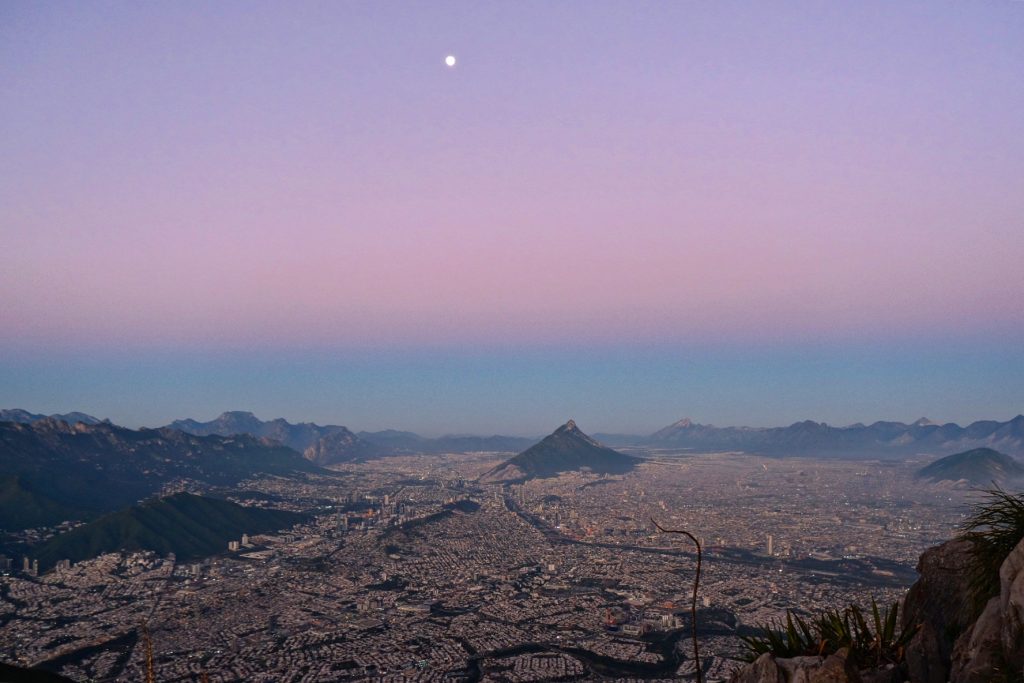
Looking down to your right, you’ll see the entirety of Monterrey sprawled out beneath you; to your left, the endless rolling hills of the Sierra Madre Oriental.
When to hike
Sunrise is my favourite time to hike to La Antena, but it does mean a very early start (around 4am depending on your pace and the time of year). If it’s your first time hiking here, I’d only suggest going for sunrise if you have someone who knows the route to go with. That will avoid relying on Uber in the very early hours and finding your way in the dark.
You don’t have to catch sunrise to enjoy it, though. Just start as early as you can, so you’re not hiking up in the heat or coming down in the dark.
3. Pico Norte: A wilder, more challenging hike
Route Overview
Pico Norte is a far more challenging hike than El Teleférico and La Antena, and demands proper planning and preparation.
There are two ways to approach Pico Norte. One starts from the same access point as the previous two hikes. The other starts from a different side of the mountain – which is the route I’d recommend. I’ll outline them both here.
Which route should I choose?
For the most direct way to reach Pico Norte, I’d take Ruta Homero. If you have more time and want a longer hike – or want to combine with a visit to El Teleférico – then opt for Paso de los Elefantes.
3a. Paso de los Elefantes
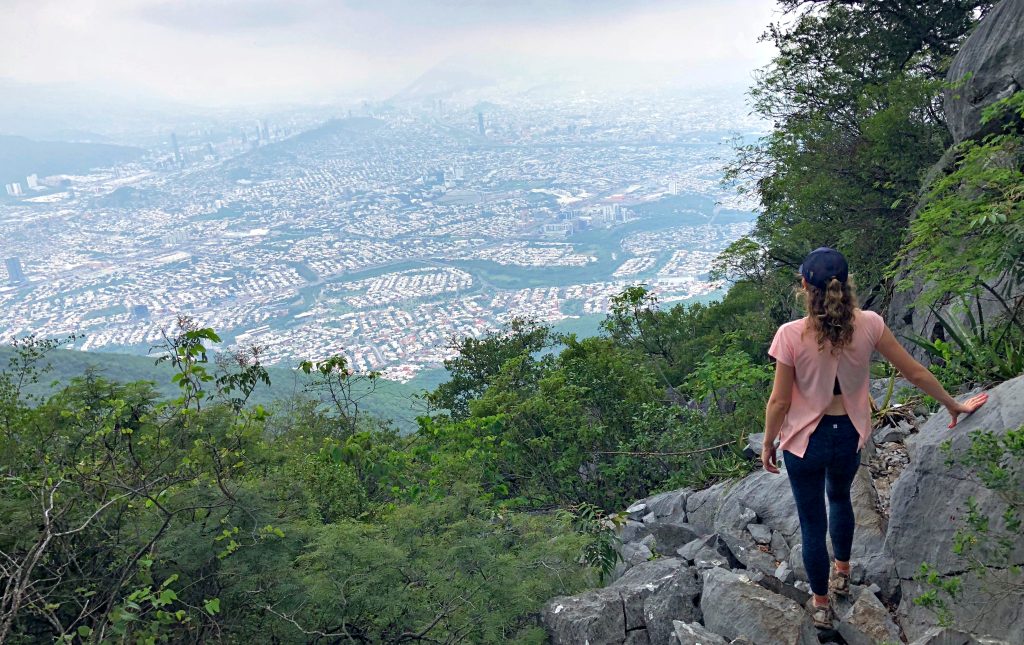
Paso de los Elefantes is the longer and wilder approach to Pico Norte. The advantage is that you pass El Teleférico on the way, so you can take in the views there on the way up. However, I do not recommend deciding to take this route on a whim (coming from experience).
If you do opt for this route, then you need to be prepared for a strenuous hike and make sure you have plenty of water and food.
Quick Facts: Pico Norte, Cerro de la Silla (Paso de los Elefantes)
Best for: A wilder hiking adventure
Difficulty: VERY HARD Rocky terrain Steep sections
Distance: 11.5 km return | Elevation gain: 1,300 m
Highest point: 1,820 m | Route type: Out & back
Estimated time: 6 – 7 hours
Start point: Bosques de La Pastora, Guadalupe
Route description
Shortly after El Teleférico you’ll see a Christ Statue on the left hand side. Continue up and round the corner, and there’s a small opening to the right with a narrower trail veering off into the trees. This is known as Paso de los Elefantes which takes you to Pico Norte.
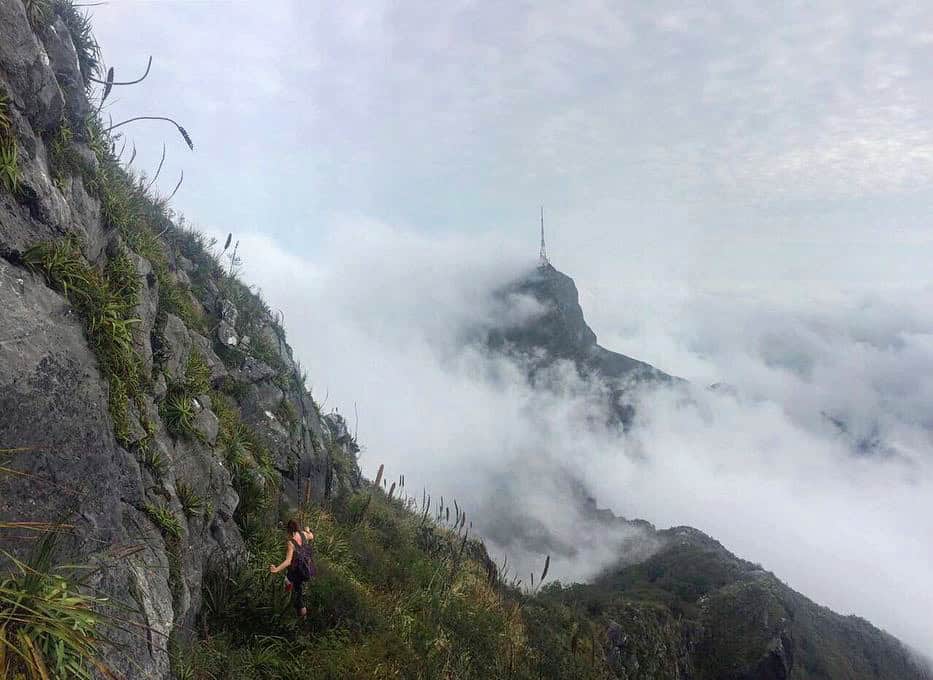
After a short flat/ slightly downhill section into the fold of the mountain, there is a steep climb to the summit over rocky ground and loose terrain. You’ll be hiking up through dense trees, which can feel incredibly hot and humid, especially in summer months.
The route is fairly well-trodden, but markings are typically limited to painted dots or arrows on rocks. The first time we attempted this route, we mistook red graffiti for a way marker and took a wrong turn before the summit – leading us to a foot-wide ledge with a sheer drop on one side.
3b. Ruta Homero
The second option – known as Ruta Homero – is the more direct way to reach Pico Norte. In some ways it’s more challenging as there are steep and rocky sections, but it’s my preferred route as you get to the summit quicker. This starts from a different access point to the previous three hikes.
Quick Facts: Pico Norte, Cerro de la Silla (Ruta Homero)
Best for: A wilder hiking adventure.
Difficulty: VERY HARD Rocky terrain Steep sections
Distance: 5.9 km return | Elevation gain: 1,120m
Highest point: 1,820 m | Route type: Out & back
Estimated time: 4 – 5 hours
Start point: Hundido Park, Avenida Alfonso Reyes
Route description
This is a continuous uphill from the start, and includes some sections of smooth rock – known as espejos (mirrors) which need to be crossed carefully and require shoes with decent grip.
You’ll gain height quickly, starting initially through a wooded track with steep and rocky sections. As you near the top and emerge from the trees, the route becomes exposed and the path less clear as you make your way over the ridge.
The views here are similar to La Antena, but the added reward of Pico Norte is the feeling of being in the middle of the Sierra, rather than on the edge of it.
4. Pico Sur: The most technical
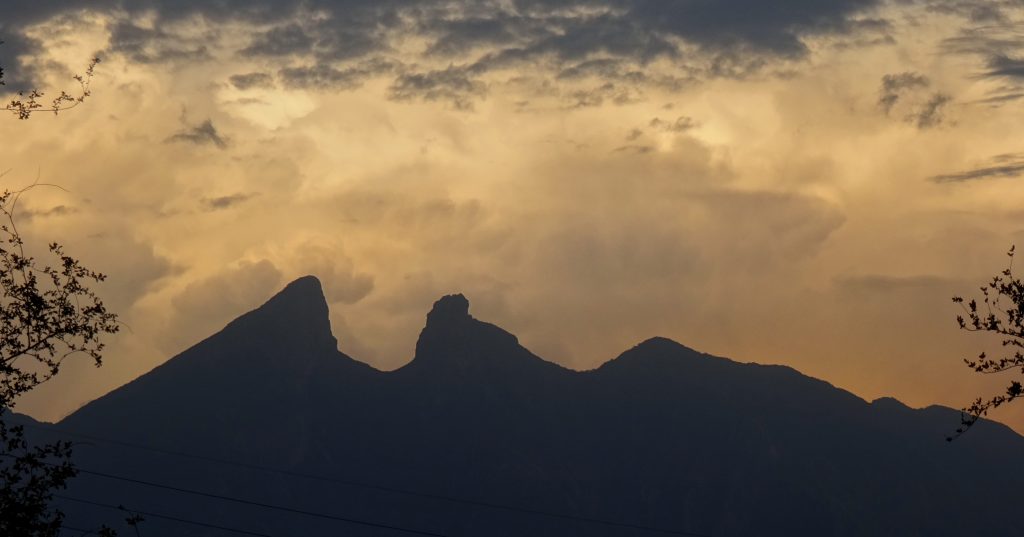
Pico Sur is a whole different category of adventure to the rest of Cerro de la Silla’s peaks. It is by far one of the most challenging hikes close to Monterrey.
What makes Pico Sur an extreme hike is the highly technical terrain which exposes you to sheer drops, and you need to use ropes and chains on some sections.
It’s not a place where you can risk a wrong step, and certainly not somewhere that you want to find out whether you have a fear of heights.
Is Pico Sur right for me?
I don’t recommend Pico Sur to the vast majority of hikers – in fact, I haven’t been tempted to return on any of my recent visits to Monterrey. If you’re tempted by the views alone, Pico Norte and La Antena give a very similar (if not better) panorama for significantly less effort and risk.
That said, if you have experience on similar highly exposed mountain routes and plan to hike with a qualified local guide, Pico Sur will undoubtedly give you a challenge you’ll be talking about for years to come.
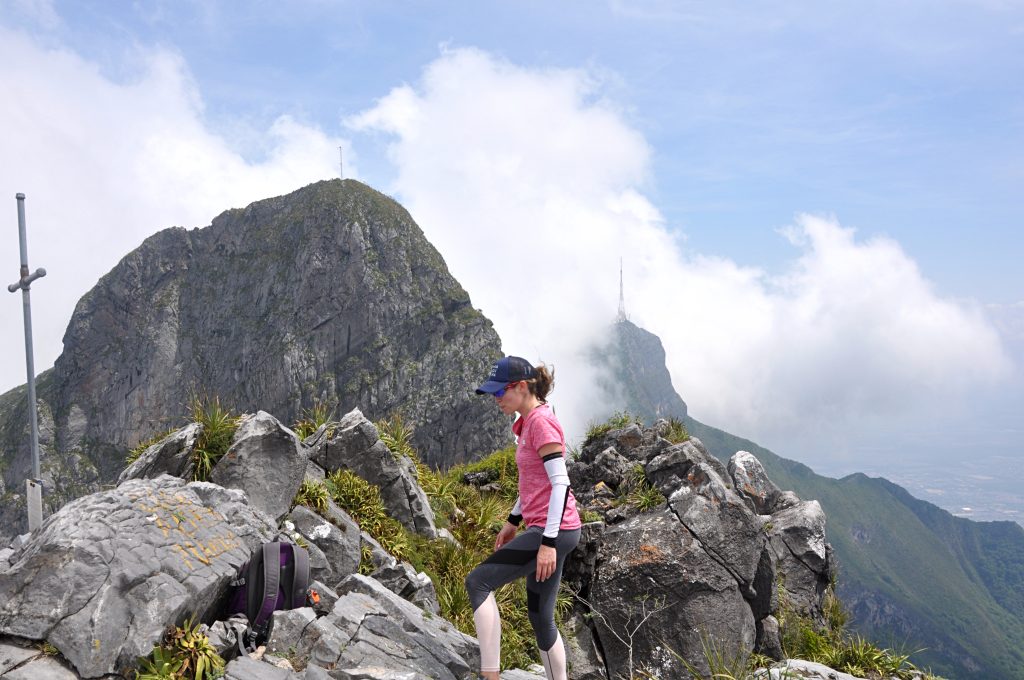
If you’re specifically seeking Cerro de la Silla’s biggest challenge, take a look at the Sillalogía, which traverses all of the mountain’s peaks in a single outing.
Best time to hike Cerro de la Silla
October – March is generally the best window to hike Cerro de la Silla, with lower average temperatures and less chance of rainfall.
June – August are best avoided if possible due to the extreme heat, but if you do hike in these months you’ll need to start extremely early in the morning.
The weather can be unpredictable in Monterrey at any time of year. I’ve known winter months to swing between 4°C and 30°C within a couple of days. Make sure you check the forecast before you hike and be prepared with an extra layer.
EXPLORE FURTHER
Combine Cerro de la Silla with Chipinque’s forest trails, from self-guided walks to guided summit hikes. Read the Chipinque Hiking Guide →
What to wear and pack
For most of the year, you’ll want lightweight, breathable clothing for hiking Cerro de la Silla, plenty of sun protection, and an optional additional layer for cooler mornings or evenings. The essentials include:
- Comfortable trail shoes with decent grip.
- Breathable hiking socks.
- Shorts and a lightweight hiking t-shirt.
- Additional layer such as a windbreaker or long-sleeved top for cooler mornings or evenings.
- In the colder months: swap the shorts for leggings or hiking trousers and bring a warmer jacket.
- A small daypack with space for water, snacks, a small first aid kit, and any other supplies.
- A head torch.
- Sun protection: sun hat, sun cream, sunglasses.
- Hiking poles are optional, but can help with balance on the way down.
- Fully charged phone with local data.
Tips for hiking Cerro de la Silla
- Carry enough water. The heat and humidity can make hiking Cerro de la Silla more demanding than expected. Carry a minimum of 2 litres of water and/or electrolyte drinks, and more for longer hikes. There is nowhere to fill up on route.
- Start early. As with Monterrey in general, these trails get hot. Start as early as possible to avoid hiking in the hottest parts of the day.
- Bring a headtorch. Essential for early starts or late descents.
- Download the route in advance. Save it for offline use so you are able to navigate and keep track of timings. Tell someone in advance where you’re headed.
Wildlife
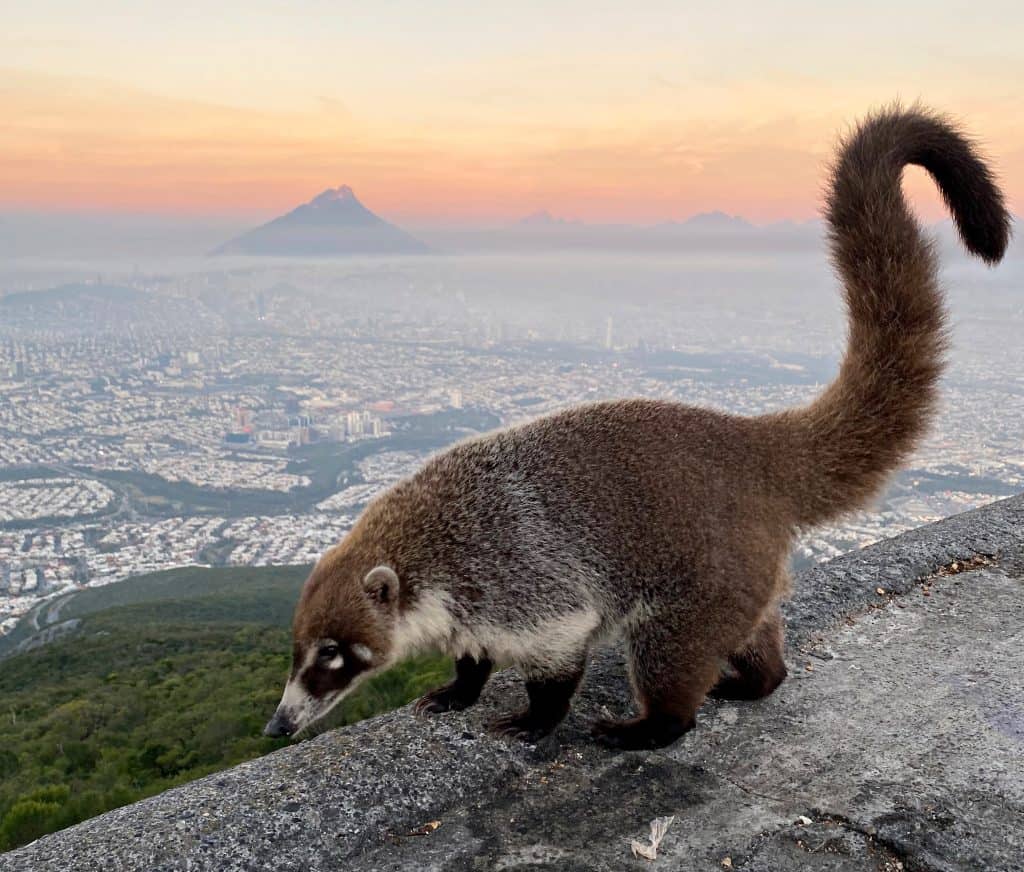
Coatis live in Cerro de la Silla and you will likely come across them, especially at the Teleférico viewpoint and at La Antena. Unfortunately, they have become increasingly accustomed to humans and the leftover food scraps they leave behind. If you see one, never feed them and be sure to take all your rubbish and fruit peels away with you.
Planning a trip to Monterrey? Download my free 3-day hiking itinerary
FAQs
Is there an entrance fee to Cerro de la Silla?
No, you do not have to pay to hike Cerro de la Silla.
Can beginners hike Cerro de la Silla?
Yes – but I would recommend sticking to El Teleférico. This is still not an easy walk, and you need to be prepared to walk uphill for about 90 minutes (depending on your pace).
Can I take my dog?
No, dogs are not permitted on the trails to protect local wildlife
How hard is Cerro de la Silla?
The trail difficulty varies widely. El Teleférico is the simplest hike; Pico Sur is by far the most demanding and technical.
Do I need a guide for hiking el Cerro de la Silla?
A guide is not strictly required for most hiking routes in Cerro de la Silla, and the trail to El Teleférico and La Antena is easy to follow. However, if you’re hiking for the first time or plan to start or finish in the dark, I recommend going with someone who is familiar with the route, or look for a local guide to accompany you. If you are hiking Pico Norte or Pico Sur, I definitely recommend looking for a local guide.
LOOKING FOR MORE HIKES NEAR MONTERREY?
Explore the best hikes across six mountain areas, with route descriptions and essential planning tips. Read the Ultimate Guide to Hiking in Monterrey →